

Ubuntu is a reliable open-source platform on Linux. It allows you to easily control network drivers and hardware settings. However, it cannot be considered a user-friendly operating system. If you are also among other users who are experiencing the “Ubuntu ethernet not working” issue? There’s no need to worry because I have got you covered with a solution.
Contents
Why is Ubuntu Ethernet Not Working?
Ubuntu ethernet may not work after a major update because sometimes the system fails to recognize the ethernet interface after an update. This happens due to interrupt management. Additionally, other factors that can affect the performance of Ubuntu ethernet are:
- Faulty ethernet cable or port.
- Problems in ethernet package.
- Network configuration issues.
How to Fix Ubuntu Ethernet Connection That is Not Working?
First of all, you should check your ethernet cable. You can try using a different port on the router and try again after restarting your system. In addition, you should also try using another ethernet cable if you have a spare one.
in most cases, the Ubuntu ethernet issue can be fixed by using another ethernet cable. However, if nothing works, you can try the fixes provided below one by one.
Check Internet Connection
Before trying anything else, make sure that your device has a strong and active internet connection. You may also restart your modem or router to make sure that there is no glitch in your connection.
If you are using a wired connection, you should check if your cables are not faulty and are properly plugged in.
Check Connection Settings
If you have been experiencing issues configuring your network device settings on Ubuntu, NetworkManager is where you need to start. NetworkManager is responsible for handling both wired and wireless networks.
First of all, you should click on the Wifi or network connection icon located on the upper-right side of your screen. Now, make sure that Wifi and network are both turned on because if one of them is turned off, you will be unable to access the internet.
Secondly, you should also restart the interface of Network Manager by using the following command:
- # sudo /etc/init.d/networking restart
After restarting the network manager, you can also check its status through this command:
- # sudo systemctl status networking
Set Network Settings
If your computer settings are not configured automatically, you can set them manually by using the following method:
- Go to the “activities overview” and write “settings”.
- Then, choose the option of settings from the list.
- If you have a wired connection, select Network. While using Wifi, ensure that the wireless module card is On.
- Now, press the settings icon and go to the IPV4 or IPV6 tab.
- Switch to the manual method and enter the Netmask, IP address, and gateway here.
- Disable the Automatic setting under the DNS section. Next, enter the Internet Protocol (IP) address of the DNS server you want to use.
- You can add more DNS servers by clicking the + button for each one.
- Disable the Automatic settings in the Routes section as well.
- Enter the Metric, Address, Netmask, and Gateway for the path you want to use. To add more paths or routes, click the + button.
- Double-check the configuration and settings for accuracy, including IP, Netmask, Gateway, and Metric. This ensures that modifications will function as intended.
- To connect your system to the network, follow these steps. First, click on the Apply button. If the connection is not established, select the System menu. Once there, look for the Connect option in the upper bar, and select it. To verify that everything is working correctly, try accessing a webpage. You could also log into your network-attached storage (NAS) to ensure that all the connections are functioning as expected.
Reset Network Settings
Several Linux users often mess with the settings of their systems including Network settings. Resetting network settings to default can resolve any problems caused by incorrect settings.
You can reset your network settings by using these steps:
- Open the terminal and run “ip addr”.
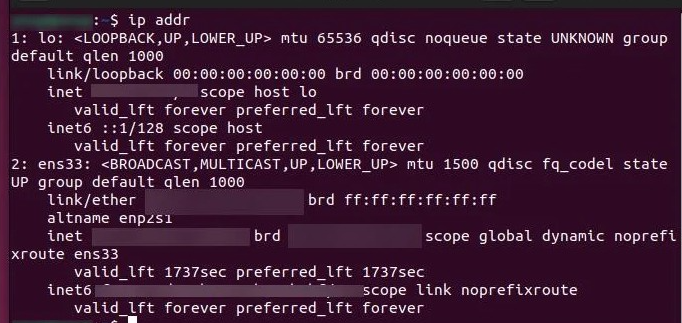
- Write down the adapter ID. It should look like eth0 or eno1.
- Then, run the “sudo nano /etc/network/interfaces” command
- A file will appear. Delete all of its information and paste the following:
# This file describes the network interfaces available on your system
# and how to activate them. For more information, see interfaces(5).
source /etc/network/interfaces.d/*
# The loopback network interface
auto lo
iface lo inet loopback
# The primary network interface
auto eno1
iface eno1 inet dhcp
- Now, change the adapter name to the one you discovered through “ip addr” and replace it with eno1.
- After that, save the file by pressing CTRL+O.
Restart your computer and see if Ubuntu ethernet starts working.
Update Operating System
If Ubuntu ethernet is still not working, you should try updating your system. It is important to regularly update your Ubuntu operating system as it can improve its performance and prevent any potential bugs.
Follow the simple steps given below to use the system updater:
- Open the application and search for “System Updater”.
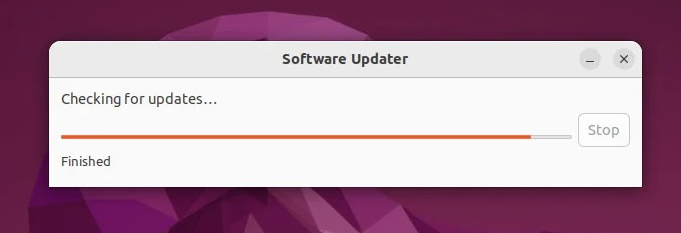
- You will be able to see the overview of available updates in a window.
- You can select all the updates you want to install. However, it is recommended that you update all of them.

- Press Install Now to install them.
- Restart the computer.
Frequently Asked Questions
Why is my wired connection not working in Ubuntu?
You should make sure that your cables are properly plugged in and that the wired connection in Ubuntu’s Network Connections settings is set to “Auto”.
How to enable Ethernet in Ubuntu?
Step 1: Press the CTRL+ALT+T keys to open the terminal.
Step 2: Type sudo ip link set down eth0 in the terminal.
Step 3: When prompted, enter your password and press Enter (NOTE: nothing will appear to be entered.
Step 4: Now, use the sudo ip link set up eth0 to enable the Ethernet adapter.
Why is my Ethernet connected but not working?
Check that the cables are properly connected and working. If you have any doubts, you should replace your cables and see if that helps.
My name is Sarah Williams, and I am the administrator and writer for Techblasted.com. I have always been intrigued by the various features and functions of apps and devices, which sparked my interest in this field. It all began as a hobby, and for the past seven years, I have been writing tech-related content online. Apart from my love for technology, I am also an avid gardener.